Solar panels are a significant investment for any home or business, providing a reliable and renewable source of energy. However, to ensure they operate at peak efficiency, regular maintenance is crucial. One of the common issues that can affect solar panels is water accumulation. Water pooling on the surface of solar panels can lead to various problems, including decreased efficiency and potential damage.
Solar drain clips offer a simple yet effective solution to this problem. In this comprehensive guide, we will delve into what solar drain clips are, their benefits, and provide a detailed step-by-step installation process.
What are Solar Drain Clips?

Definition and Overview
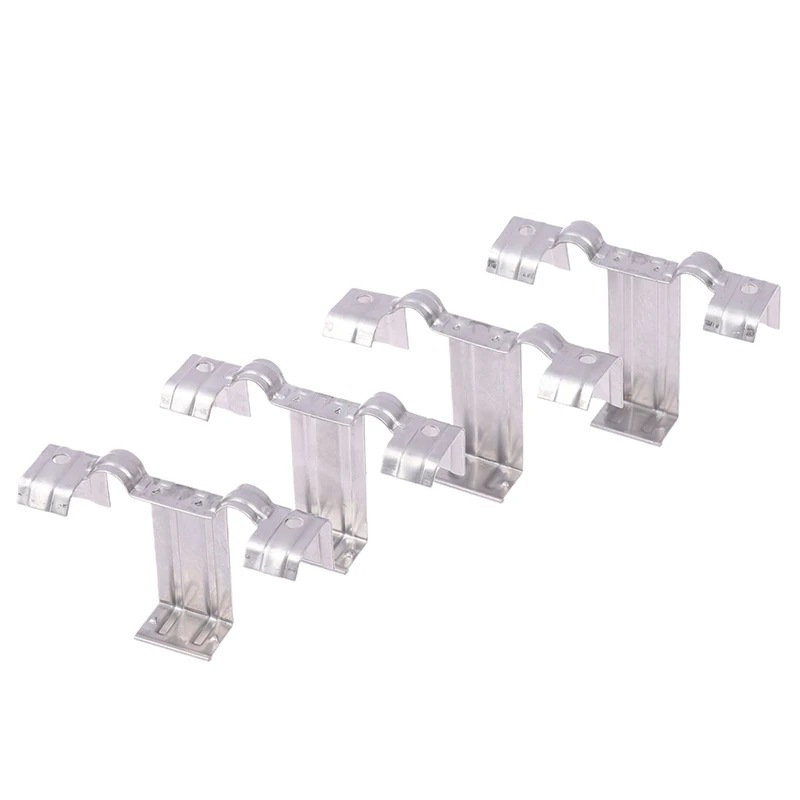
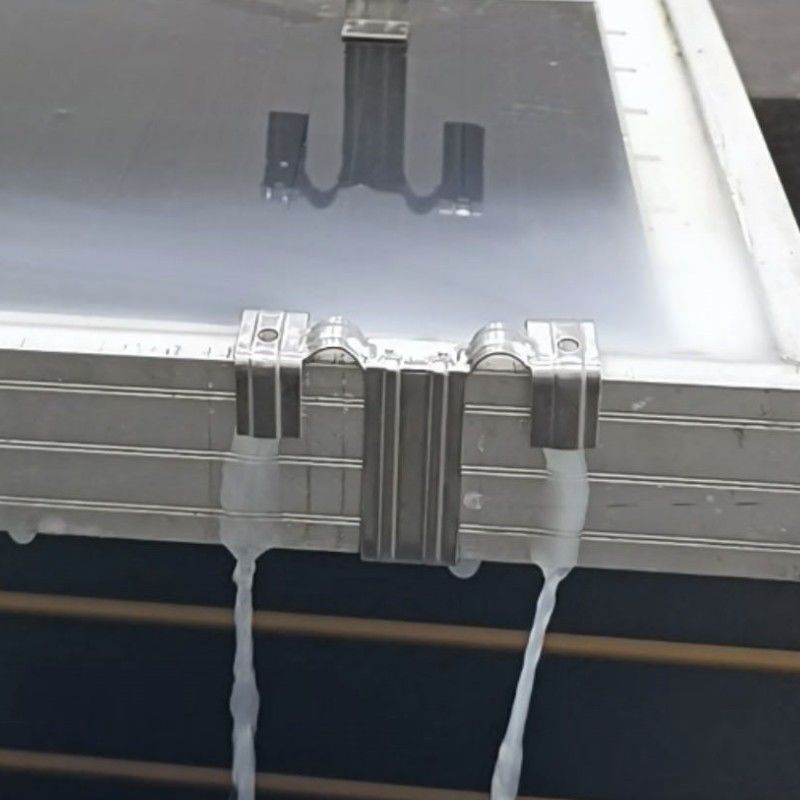
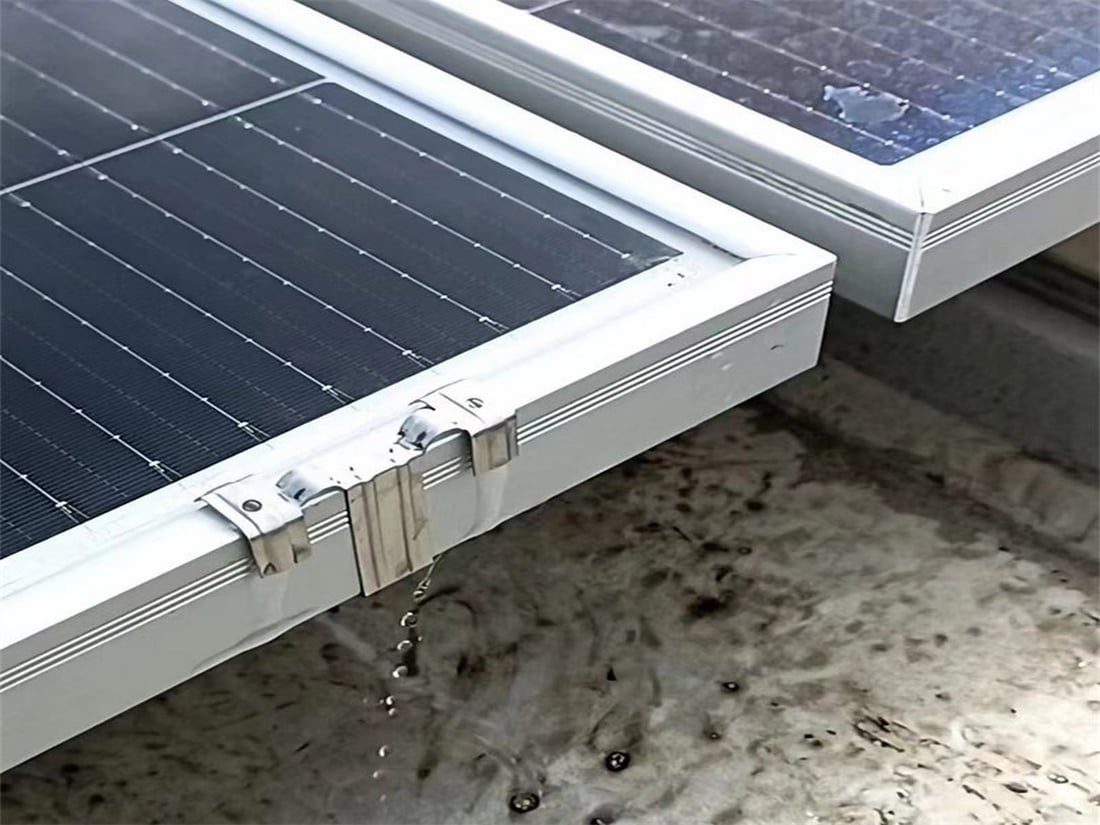
Solar drain clips are small yet essential components designed to prevent water from pooling on the surface of solar panels. These clips are installed at strategic points on the solar panels to facilitate proper drainage, ensuring that water flows off the panels efficiently. By allowing water to drain off, solar drain clips help maintain the performance and longevity of solar panels.
Benefits of Using Solar Drain Clips
1. Prevent Water Accumulation
One of the primary benefits of solar drain clips is their ability to prevent water from accumulating on the surface of solar panels. Standing water can cause a range of issues, from reduced efficiency due to obstructed sunlight to potential physical damage over time.
2. Protect Against Damage
Solar panels are designed to withstand various weather conditions, but continuous exposure to standing water can lead to problems such as micro-cracks, delamination, and corrosion. Solar drain clips help mitigate these risks by ensuring water drains off the panels promptly.
3. Enhance Longevity
By preventing water-related damage, solar drain clips contribute to the extended lifespan of solar panels. Proper maintenance using these clips can help protect your investment and ensure that your solar panels continue to perform optimally for many years.
Step-by-Step Guide to Installing Solar Drain Clips
Step 1: Gather Necessary Tools and Materials
Before you begin the installation process, make sure you have all the necessary tools and materials on hand. You will need:
- Solar drain clips
- A screwdriver
- A ladder (if your panels are roof-mounted)
- Safety gear (gloves, safety glasses, and a harness if working at height)
- Cleaning supplies (soft cloth, mild detergent, and water)
Step 2: Ensure Safety First
Safety should always be your top priority when working on roofs or with solar panels. Wear appropriate safety gear, ensure your ladder is stable, and consider using a harness if you are working at height. If you are not comfortable performing the installation yourself, consider hiring a professional.
Step 3: Clean the Solar Panels
Before installing the solar drain clips, it's essential to clean the solar panels thoroughly. Use a soft cloth and a mild detergent solution to remove any dirt, debris, or bird droppings from the surface of the panels. This will ensure that the clips adhere properly and function as intended.
Step 4: Identify Installation Points
Next, identify the appropriate points on the solar panel frames where the drain clips should be installed. Typically, these points are at the lower edge of the panels where water naturally tends to accumulate. Consult the manufacturer's instructions for specific guidelines on clip placement.
Step 5: Attach the Solar Drain Clips
Now, it's time to attach the solar drain clips. Follow these steps:
- Position the clip at the designated point on the solar panel frame.
- Secure the clip with screws, ensuring a snug fit. Be careful not to overtighten the screws, as this could damage the panel or the clip.
- Repeat the process for each clip needed, ensuring consistent placement across all panels.
Step 6: Inspect the Installation
After all the clips are attached, inspect the installation to ensure all clips are securely fastened and properly aligned. This will help ensure that the clips function effectively in draining water off the panels.
Step 7: Test the Drainage
Finally, test the drainage by pouring water onto the panels to observe if it flows freely through the clips. If you notice any areas where water still accumulates, adjust the clips as necessary to improve drainage.
Bonus: Get More Solar Mounting Equipment Here
Maintenance Tips for Solar Drain Clips

1. Regular Inspections
Conduct regular inspections of your solar panels and drain clips to ensure they remain in good condition. Look for any signs of wear, damage, or loosening of the clips, and address any issues promptly.
2. Clean and Clear Debris
Keep the area around the clips clean and clear of debris that could block drainage. Regular cleaning will help maintain optimal performance and prevent potential problems.
3. Monitor Panel Performance
Monitor the performance of your solar panels to identify any issues early on. If you notice a decrease in efficiency, it could be a sign that the clips are not functioning correctly, or there may be other maintenance issues to address.
FAQ - Frequently Asked Questions about Solar Drain Clips
Q1: Does water break solar panels?
Answer: Water itself does not typically break solar panels. However, standing water can cause damage over time by leading to micro-cracks, delamination, and corrosion. These issues can reduce the efficiency and lifespan of your solar panels. Solar drain clips help prevent these problems by ensuring proper drainage.
Q2: What is a solar clamp?
Answer: A solar clamp is a device used to secure solar panels to their mounting structures. Solar clamps ensure that the panels stay in place even under adverse weather conditions, such as strong winds. They come in various types, designed to fit different mounting systems and panel frames.
Q3: Can cold water crack solar panels?
Answer: Cold water alone is unlikely to crack solar panels. However, sudden temperature changes can cause thermal stress on the panels, potentially leading to micro-cracks. It is essential to avoid abrupt temperature shifts and ensure proper drainage to minimize the risk of damage.
Q4: How many clamps do I need for solar panels?
Answer: The number of clamps required depends on the size and type of your solar panels and the mounting system. Typically, each panel requires at least four clamps (one for each corner) to secure it properly. Consult the manufacturer's guidelines for specific requirements to ensure optimal security and performance.
Conclusion
In conclusion, solar panel water draignage clips are a valuable addition to any solar panel system. They help prevent water accumulation, protect against damage, and enhance the longevity of your solar panels. By following this step-by-step guide, you can ensure that your solar drain clips are installed correctly and effectively, providing peace of mind and maintaining the optimal performance of your solar investment.

